How to Install a Rubber (EPDM) Roof on a Flat Roof
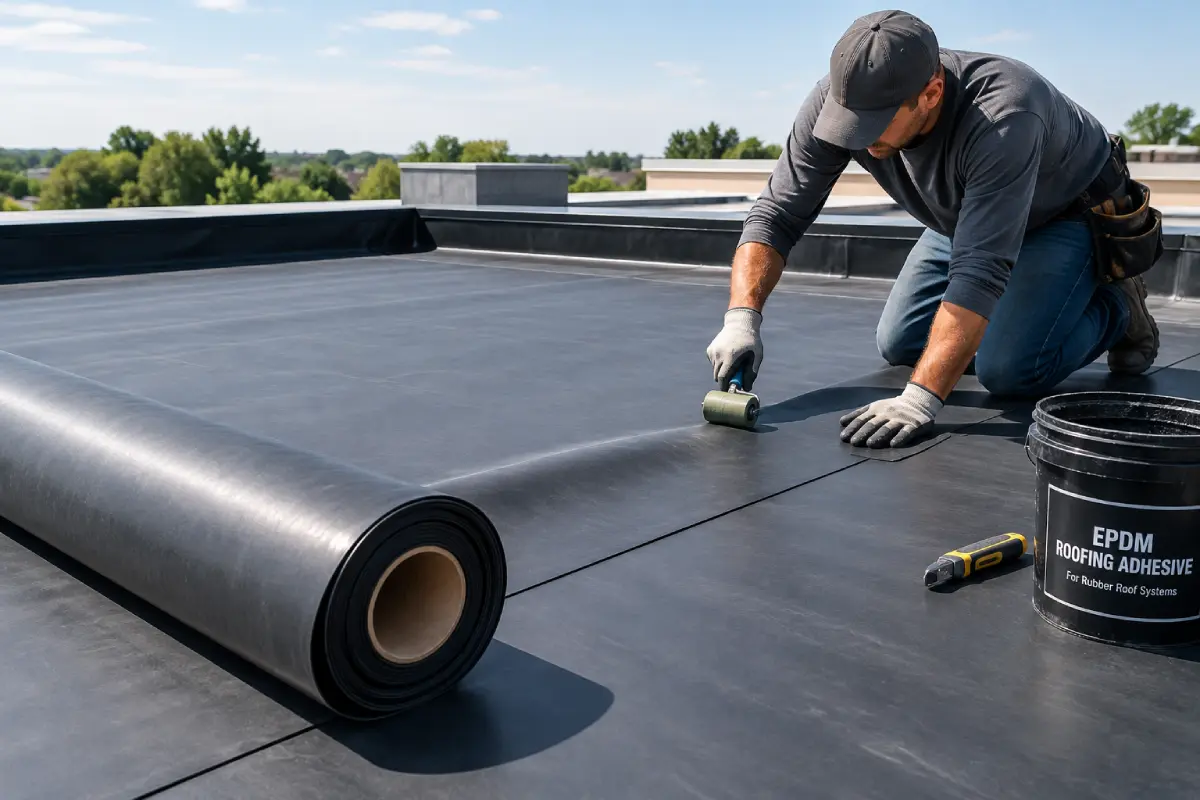
A rubber roof, properly called EPDM, is a single sheet of synthetic rubber glued to the roof deck. On a shed, garage, porch, or small addition, one sheet usually covers the whole roof with no seams at all, which is exactly why it is one of the most reliable flat roofs a homeowner can install.
The work is not difficult. It is unforgiving of a poor deck, the wrong adhesive in the wrong place, and cut corners, literally, so those are what this guide concentrates on.
Is your roof suitable?
EPDM is designed for low and flat roofs, but not for dead-level ones. The residential code requires a design slope of at least 1/4 inch per foot (1/4 in 12) for single-ply membranes like EPDM, so that water drains rather than standing.
Check two things:
- Fall: the roof should drop at least 1/4 inch for every foot toward a gutter or edge. A 10-foot roof needs 2-1/2 inches. The roof pitch calculator converts measurements.
- Ponding: water that stands for more than a day or two after rain shows a low spot or a sagging deck, and it needs fixing in the structure before any membrane goes on.
Not sure EPDM is the right system for your roof? Compare it with TPO and modified bitumen in flat roof systems compared before you buy.
Materials: what you need to put on a rubber roof
- EPDM membrane, in one piece big enough to cover the roof plus the overhang at every edge and any upstand against walls. It comes in two common thicknesses, 45 mil (about 1.1 mm) and 60 mil (about 1.5 mm). The thicker sheet resists punctures better and is easier to lay without wrinkles.
- Water-based deck adhesive for the main field of the roof.
- Contact (bonding) adhesive for the perimeter and upstands.
- Edge trims: a drip trim for the edge water drains to, and a raised curb or edge trim for the other edges, which keeps water on the roof moving toward the gutter.
- Pre-formed pipe boots and corner pieces for any penetrations.
- Primer and seam tape, only if a seam is unavoidable.
- A short-pile paint roller, a stiff push broom, a seam roller, and a sharp knife.
EPDM kits sold for sheds and garages usually include the membrane, both adhesives, and trims sized together, which removes most of the guesswork. For a shed or porch that nobody walks on, 45 mil is adequate; choose 60 mil where there will be foot traffic, overhanging branches, or a garage or addition below.
Why there are two adhesives
This is where most DIY rubber roofs go wrong.
- Water-based adhesive is applied to the deck only, and the membrane is laid into it while it is still wet. It bonds well over the large flat area and gives you a few minutes to smooth out air bubbles. It does not grip well on vertical surfaces or at edges where the membrane is being pulled.
- Contact adhesive is applied to both the deck and the underside of the membrane, and they are joined only once the adhesive has become tacky, when a knuckle touched to it comes away clean. It grabs instantly and cannot be repositioned. It is used around the perimeter, typically the outer 6 inches or so, and on upstands and fascias.
Using water-based adhesive at the edges lets the membrane creep. Using contact adhesive over the whole field is expensive, hard to lay without wrinkles, and gives no chance to correct mistakes.
Weather matters
Water-based adhesive needs to dry out after the membrane is laid, and it fails if it freezes or gets wet before it cures. Manufacturers typically require temperatures above about 41°F (5°C), no frost overnight, and a dry forecast for a day or two. Contact adhesive also needs dry conditions, and it takes longer to flash off in cold, damp air.
A dry, mild day with no wind is ideal. Wind lifts a loose sheet and blows grit into wet adhesive.
Step 1: Get the deck right
EPDM follows every flaw in the surface beneath it, and a lump under the membrane becomes a wear point.
- Use a sound deck of exterior-grade plywood or OSB. Replace any soft, delaminated or stained boards.
- Fix it down with screws driven flush or just below the surface, with no nail heads standing proud.
- Fill large gaps between boards and sand down any raised edges.
- Sweep and then vacuum it. The deck must be clean, dry and free of dust or grease.
Do not glue EPDM onto old felt, bitumen or asphalt roofing. The adhesives are not compatible with those surfaces, and the old covering’s own weaknesses carry through. Strip back to the deck, or overlay a new board on top of the old roof.
Step 2: Prepare the edges and trims
Most kits use one of two edge approaches, and the instructions for yours take priority:
- Trims fitted after the membrane: the membrane is wrapped over the edge of the deck and down the fascia, then the trim is fixed over it.
- Trims fitted before the membrane: the membrane is laid over the top flange of the trim and bonded to it.
Either way, make sure water will leave the roof at one edge, into a gutter, and the raised trims on the other edges direct it there.
Where the roof meets a wall, plan an upstand: the membrane runs at least 6 inches up the wall, and is covered by a metal counter-flashing or tucked behind the wall cladding.
Step 3: Lay out the membrane and let it relax
Unroll the membrane over the roof and position it so it overhangs every edge evenly and reaches up any wall. Leave it for at least 30 minutes, longer on a cool day. EPDM is folded tightly in the box, and it needs time to flatten and shrink back to its real size before being glued.
Do not stretch it into place. A stretched membrane pulls back from its edges and corners as it ages.
Step 4: Bond the main field
- Fold back half of the sheet lengthways, so the fold line runs down the middle of the roof, without shifting the half still in place.
- Roll water-based adhesive onto the exposed deck in an even coat, stopping about 6 inches short of the edges, which are for contact adhesive.
- Roll the membrane back into the wet adhesive smoothly, without dragging it.
- Sweep it down firmly with a stiff push broom, working from the center outward, pushing air to the edges.
- Repeat for the other half.
Work steadily. Water-based adhesive gives you some working time, but not much on a warm day.
Step 5: Bond the perimeter and upstands
Fold back the unbonded edge strip. Apply contact adhesive to both the deck and the underside of the membrane, thinly and evenly. Wait until it is tacky and no longer transfers to a knuckle.
Then lower the membrane onto the deck carefully, because it grabs on contact, and roll it down with a hand roller. Do the same up any upstand, working from the bottom of the wall upward.
Step 6: Corners without cuts
Never cut the membrane at a corner to make it lie flat. A cut is a joint, and a joint is at the most stressed point on the roof.
At an external corner, where the membrane turns down over two fascias, pinch the surplus into a vertical fold, press it flat against one fascia, and bond it with contact adhesive. At an internal corner, where a roof meets two walls, fold the excess into a neat triangle against the wall. Pre-formed corner pieces are available where folding is not practical.
Step 7: Trims and penetrations
Trim the membrane at the edges so it finishes cleanly under or behind the edge trims, leaving the overlap the kit specifies. Fix the trims at the recommended spacing.
Around a pipe or vent, cut a small hole slightly smaller than the pipe, pull the membrane over it, and fit a pre-formed EPDM pipe boot with primer and seam tape. Avoid homemade solutions with mastic; they fail first.
If you cannot avoid a seam
On a small roof, there should be none. If one is necessary, overlap the sheets by at least 3 inches, clean both surfaces, apply EPDM primer to both, allow it to flash off, lay seam tape, press the joint together, and roll it firmly with a seam roller along its full length. Place the seam so water runs over it, not into its edge.
Adhesives and height
Contact adhesive gives off solvent fumes and is highly flammable. Use it in the open air, away from any flame or spark, and keep lids on tins between uses. When working on a garage or addition roof, remember that a wet adhesive surface is extremely slippery, and plan your work so you never back toward an edge. Keep off any flat roof that flexes noticeably between joists.
Mistakes that shorten a rubber roof’s life
- A rough or dirty deck showing through the membrane.
- Bonding to old felt or bitumen.
- Skipping the relaxation time and gluing a membrane still full of folds.
- Water-based adhesive on edges and upstands.
- Stretching the sheet into position.
- Cutting corners instead of folding them.
- Laying it before frost or rain, before the adhesive cures.
- Installing on a roof that ponds.
How long it lasts
A well-installed EPDM roof on a sound deck commonly lasts several decades, far longer than roll roofing, with almost no maintenance beyond keeping it clear of debris and checking the edges and any penetrations each year. Small punctures can be patched with primer and EPDM patch material.
For how EPDM compares with the other main low-slope systems, see EPDM, TPO and modified bitumen compared.
Frequently asked questions
How long does a rubber roof last?
A well-installed EPDM roof on a sound deck commonly lasts several decades, with little upkeep beyond clearing debris and checking the edges and penetrations each year.
Can you install EPDM over old roofing?
Not over felt, bitumen or asphalt roofing. The adhesives are not compatible with those surfaces. Strip back to the deck, or fix a new board over the old roof first.
Do you need two adhesives?
Yes. Water-based adhesive bonds the main field, and contact adhesive holds the perimeter and upstands, where a water-based adhesive lets the membrane creep.
More shed roof guides
- How to install asphalt shingles on a shed roof
- How to shingle a lean-to shed roof
- How to shingle a gambrel shed roof
- How to finish the last row of shingles on a shed roof
- How to install a metal roof on a shed
- How to install rolled roofing
- Minimum roof pitch for a shed, by material
- How many bundles of shingles a shed roof needs
- Best roofing for a shed: shingles, metal, roll roofing or EPDM
Working out quantities and pitch? The shed roof calculator, shingle bundle calculator and drip edge calculator do the arithmetic.
More flat roof guides
- EPDM vs TPO vs modified bitumen: which flat roof is right
- Can you put asphalt shingles on a flat roof?
- How to install metal roofing on a flat roof
- How to install rolled roofing on a flat roof
- Ponding water on a flat roof: causes and fixes
- How long a flat roof lasts, by membrane type
- How much a flat roof costs to replace
The flat roof membrane calculator and roof coating calculator work out the quantities.
Conclusion
Confirm the roof falls at least 1/4 inch per foot and does not pond, then prepare a clean, smooth, dry deck. Lay one sheet, let it relax, bond the field with water-based adhesive and the edges and upstands with contact adhesive, fold the corners rather than cutting them, and finish with trims that carry water to one edge.
Done in that order, on a dry and mild day, a rubber roof is one of the few flat roofs a homeowner can install that will still be doing its job decades later.