How to Finish the Last Row of Shingles on a Shed Roof
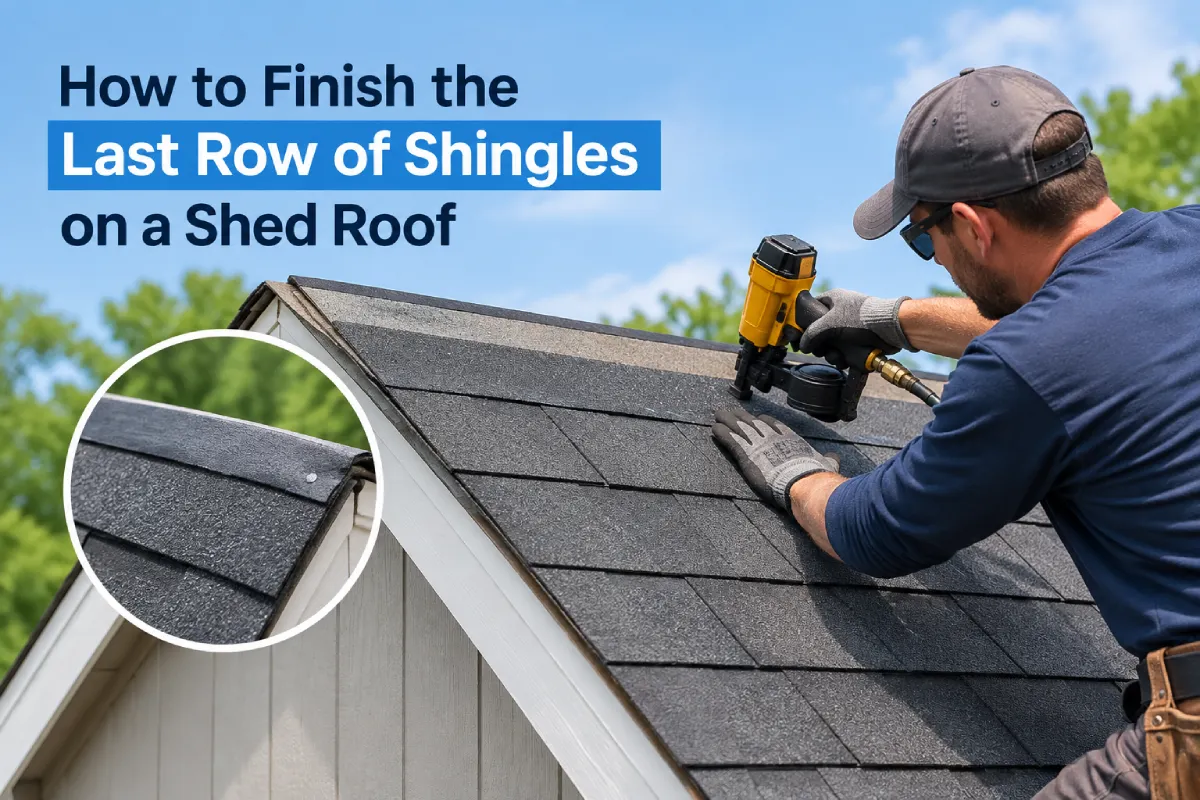
How you finish the last row depends on what is at the top of the roof. There are three possibilities on a shed: a ridge where two slopes meet, an open high edge on a single-slope shed, or a wall where a lean-to meets another building. Each needs a different finish, and advice written for one usually fails on the others.
What the three have in common is the goal. Every nail in the top course has to end up covered by something that sheds water, and the top edge of the shingles must not be a place where wind-driven rain can get underneath.
Plan the last row before you lay the first
Most awkward top rows are created at the eave. Shingle courses go on at a fixed exposure, so the width of the final course is decided by the length of the slope, not by anything you do at the top.
Before you start, measure the slope from the eave to the peak or top edge. Subtract the starter and first course, divide the rest by the exposure, and see what is left over. If the final course would be less than about half a shingle wide, it will be difficult to nail where the nails are hidden and difficult to seal. Adjusting the first course by an inch or so, or very slightly adjusting exposure across the whole roof within the manufacturer’s tolerance, moves that leftover to a workable size.
If you are already at the top with a sliver, it can still be finished, but the method below matters more.
Situation 1: A ridge with two slopes
This is the easy one, because the ridge cap covers everything.
- Run the courses up each side until the next full course would cross the peak.
- Trim the top course on each side so it reaches the peak without wrapping over it. Snap a chalk line along the ridge to keep the cut straight. Nail it on its normal nail line; if the course is narrow, nail as high as practical, within about an inch of the peak, where the cap will cover the heads.
- Check the gap at the ridge. The two sides should meet neatly. Where a ridge vent is being fitted, leave the ventilation slot open as its instructions specify.
- Cut or buy ridge cap. Three-tab shingles cut into thirds at the cutouts give 12 by 12-inch pieces. Taper the top corners of each piece slightly so the part covered by the next piece does not show at the sides. Purpose-made hip and ridge shingles are thicker and pre-shaped, and are the better choice for laminated roofs.
- Fit the cap from the end away from the prevailing wind. Bend each piece over the ridge, center it, and nail one nail each side, about 1 inch in from the edge and just below where the next piece’s exposure will end. Keep exposure consistent, usually around 5 inches.
- Finish the last cap piece. Cut the exposed part from a spare cap piece and nail it over the final joint. Its two nails will be visible; put a dab of roofing cement over each head.
In cold weather, warm cap pieces before bending them. Cold asphalt cracks along the fold, and a cracked cap is a leak straight onto the ridge.
Situation 2: An open high edge on a single-slope shed
This is the one most guides get wrong. There is no ridge cap to hide the nails, and the high edge takes wind from the side and from behind.
The commonly given method is to cut shingle strips, nail them along the edge, and cover the exposed nail heads with roofing cement. It works for a season or two. Then the cement dries, shrinks and cracks under sun and frost, and each nail becomes a small leak into the deck at the one edge nobody looks at.
A more durable finish uses metal over the top.
- Wrap the underlayment over the high edge by a couple of inches and fasten it to the face of the fascia or top board.
- Lay the courses up to the high edge and trim the last full course flush with the edge of the deck.
- Cover the last nail line. If the final course is narrow and its nails would sit close to the top, add a strip cut from a shingle, headlap only, with its sealant strip facing the edge. Nail it within about an inch of the edge.
- Fit metal over the top edge. Drip edge fitted over the shingles works: its flat flange lies on top of the last course and its lip folds down the face of the fascia. A wider custom-bent cap, sometimes sold as gable or top-edge trim, gives more cover. Fasten it through the face into the fascia board, not down through the top of the shingles.
- Seal the top flange to the shingles with a thin continuous bead of roofing sealant along its lower edge, so wind cannot drive water under the metal.
Every nail is now under metal, and the only sealant in the detail is a backup rather than the waterproofing itself.
If you have already cemented over nails
It is not a disaster, but check it every spring. Once the cement is cracked or lifting, scrape it off, reseal the heads, and plan to fit a metal top trim over the edge the next time you have a ladder out. The metal is inexpensive and removes the maintenance item for good.
Situation 3: Where a lean-to meets a wall
Here the top course meets a vertical surface, and water running down the wall has to be carried out over the shingles rather than behind them. The component that does it is headwall flashing, sometimes called apron flashing.
- Turn the underlayment a few inches up the wall.
- Finish the shingles with the top course trimmed so it runs into the wall, and nail it as high as practical.
- Fit an L-shaped metal flashing along the joint, one leg lying on top of the last course and the other running up the wall. Each leg is commonly at least 4 inches.
- Tuck the upright leg behind the wall cladding or house wrap, so water on the wall runs over the front of the flashing. Where the wall is masonry, the flashing is covered by a counter-flashing let into a mortar joint.
- Fasten the flashing to the wall, not through the part lying on the shingles, and bed its lower edge on a bead of sealant.
The mistake to avoid is face-sealing the flashing to the outside of the siding with caulk. It will look sealed. Water running down the wall behind the siding will still reach the top of the roof and go under the shingles.
If the wall carries on past the end of the lean-to roof, a kick-out flashing at the lower end diverts water away from the wall below.
Which method, at a glance
- Two slopes meeting at a peak: trim both top courses at the ridge, cover with ridge cap, seal only the last cap’s nails.
- Single slope, nothing above the top edge: trim flush, cover the last nail line, then metal drip edge or top trim over the edge.
- Single slope against a wall: trim into the wall, then headwall flashing tucked behind the cladding.
Mistakes at the top of the roof
- Exposed nail heads covered only with cement, which lasts a season or two.
- A sliver course nailed through its face because there was no room to nail it higher.
- Drip edge fitted under the top course on a high edge, where it catches water instead of shedding it.
- Flashing caulked to the outside of siding rather than tucked behind it.
- Ridge cap bent in the cold and cracked along the fold.
- Cap laid into the wind, so each lap faces the weather.
If you are still planning the rest of the roof, the full sequence from the eave up is in how to install asphalt shingles on a shed roof.
Conclusion
Work out what is at the top of your roof first. A ridge gets trimmed courses and ridge cap. An open high edge gets its last nails covered and a metal trim over the top. A wall gets headwall flashing tucked behind the cladding.
In all three, the test is the same: stand back and look for any nail head that relies on cement alone. Where there is one, there is a better way to finish that edge.