How to Install Asphalt Shingles on a Shed Roof, Step by Step
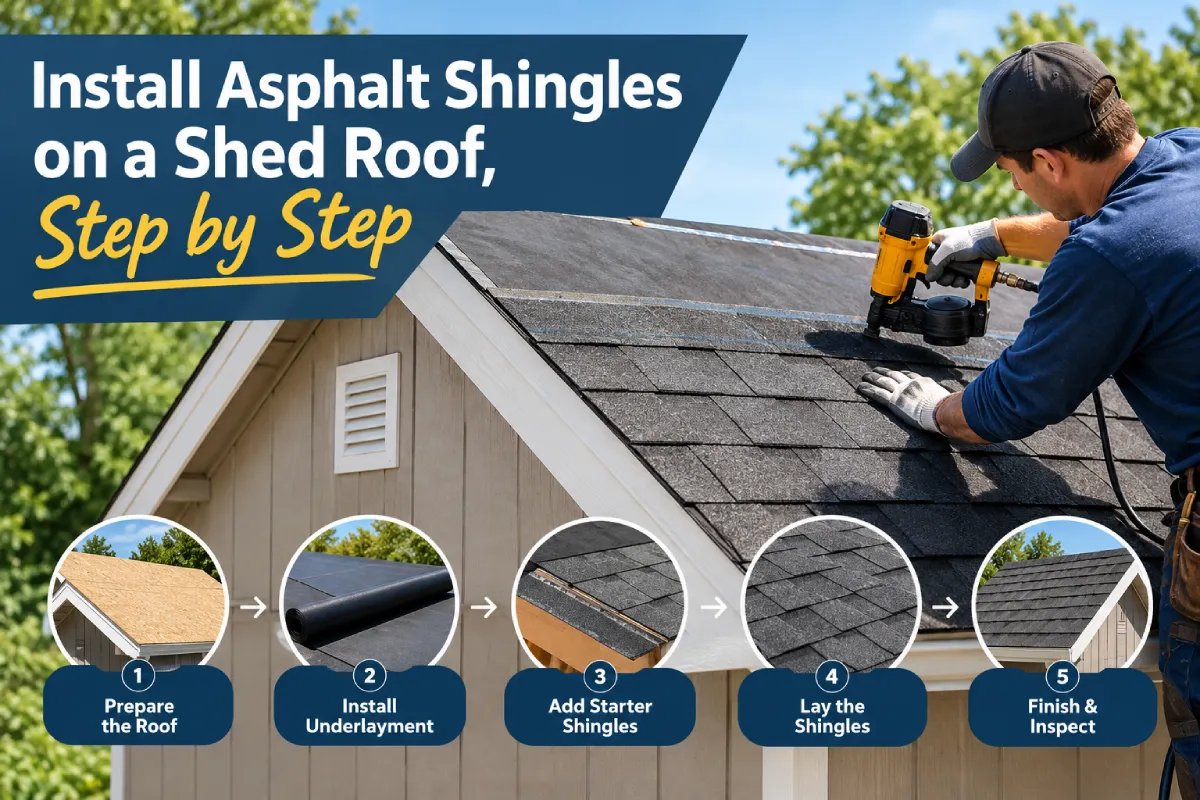
A shed roof is the best place there is to learn shingling. It is low, it is small, and the whole job fits into a weekend. The method is the same one used on a house: drip edge, underlayment, a starter course, then overlapping courses working upward, each one hiding the nails of the course below.
What catches beginners out is not the shingling itself. It is skipping the checks at the start, and a handful of small measurements that decide whether the roof sheds water or sends it under the shingles.
Check the pitch before you buy anything
Asphalt shingles are a steep-slope material. They work by gravity: each course overlaps the one below, and water runs over the laps rather than through them. On a shallow roof, water moves slowly enough to be pushed back up under the laps by wind.
The residential code sets two lines.
- Below 2 in 12 (2 inches of rise per 12 inches of run), asphalt shingles are not allowed at all. Use roll roofing or a membrane instead.
- From 2 in 12 up to 4 in 12, shingles are allowed only over a double layer of underlayment.
- 4 in 12 and steeper take the standard single layer.
Many sheds, particularly single-slope and lean-to designs, sit right around these numbers. Measure the rise over a 12-inch level, or use the roof pitch calculator, before you commit to shingles.
Materials and how much to buy
- Shingles. Most shingles come three bundles to a square, and a square covers 100 square feet.
- Starter strip for the eaves, and ideally the rakes too.
- Hip and ridge cap if the shed has a ridge.
- Underlayment: synthetic, or No. 15 or No. 30 felt.
- Drip edge for every roof edge.
- Roofing nails: galvanized, 12 gauge minimum shank, 3/8-inch head, long enough to go 3/4 inch into the deck or right through it. On a typical 7/16 or 1/2-inch shed deck, 1-1/4 inch nails usually do it.
- Asphalt roofing cement, a small tube, for cold-weather sealing and trimming details.
To work out quantity, measure each roof plane along the slope (eave to ridge) and across (rake to rake), multiply, add the planes together, and add around 10 percent for waste and trimming. Divide by 100 for squares, then multiply by three for bundles. The shingle bundle calculator does the sums and adds starter, cap, and drip edge.
Buy one spare bundle from the same batch. Colors vary between production runs, and a future repair matches far better from your own stock.
Tools
Hammer or a roofing nailer, utility knife with hooked blades, tape measure, chalk line, tin snips for the drip edge, a flat bar, a straightedge, and a stapler or cap nails for the underlayment. A sturdy ladder and, above a very low pitch, roof brackets with a plank to stand on.
Step 1: Prepare the deck
The deck is the plywood or OSB the roof is nailed to, and shingles telegraph every flaw in it. Replace any soft, delaminated, or water-stained sheets. Drive down or pull any proud nails. Sweep it clean.
The deck must be dry. Shingling over damp OSB traps the moisture, and it shows up as buckled rows once the sun gets to it.
Step 2: Drip edge along the eaves
Fit the drip edge along the bottom edges first, directly on the deck. The metal hangs over the fascia so water drips clear of the wood instead of running back along the underside.
Nail it roughly every 12 inches, close to the top edge of the flange where shingles will cover the nails. Overlap lengths by about 2 inches, and at the corners cut and fold the metal rather than leaving a gap.
Step 3: Underlayment
Roll the first course of underlayment along the eave, over the eave drip edge, and work upward. Each course overlaps the one below, so water running down the roof always crosses a lap from above.
For felt, overlap horizontal seams by 2 inches and end seams by 4 to 6 inches. Synthetic underlayments are marked with their own overlap lines, commonly 4 inches, and those take priority. Fasten with cap nails or staples as the product requires.
Between 2 in 12 and 4 in 12, lay a double layer: a half-width strip at the eave, then full-width sheets each overlapping the one below by just over half their width, so every point on the roof has two layers.
Step 4: Drip edge along the rakes
Now fit drip edge on the sloping side edges, this time over the underlayment. That order matters: at the eaves the underlayment laps over the metal, at the rakes the metal laps over the underlayment, so in both places water is carried outward rather than behind anything.
Start at the bottom of each rake and work up, with each upper piece lapping over the lower one.
Step 5: Snap your layout lines
Five minutes with a chalk line saves an hour of wavering courses. Measure up from the eave along both rakes, mark the top of each course at the exposure printed on the bundle, and snap lines across. Exposure is commonly 5 inches for three-tab shingles and 5-5/8 inches for laminated ones, but the wrapper is the authority.
Measure the full slope before you start. If the last course at the top is going to be a thin sliver, adjust the first course slightly so the final one comes out at a workable width.
Step 6: Starter course
The starter course is a row with its sealant strip at the very bottom edge. It fills the gaps under the first row’s cutouts and glues the bottom edge of the first course down against wind.
Lay purpose-made starter strip, or three-tab shingles with the tabs cut off, along the eave so it overhangs the drip edge by about 1/4 to 3/4 inch. Offset its joints from the first full course by several inches so no seam lines up with another. Nail it about 2 to 3 inches up from the bottom edge. Running starter up the rakes as well gives those edges a sealed, straight line.
Step 7: Lay the courses
Start the first full course at one rake, flush with the starter along the bottom and overhanging the rake drip edge by the same 1/4 to 3/4 inch.
Nailing is where roofs are won or lost:
- Four nails per shingle as a minimum, six where the manufacturer asks for it in high-wind areas.
- On the nail line the wrapper describes, just below the sealant strip on most three-tab shingles and in the marked nailing zone on laminated ones. Too high and the nail misses the course below; too low and it shows.
- About 1 inch in from each end, with the others spaced evenly.
- Flush, square, and not overdriven. A nail head that cuts into the mat holds almost nothing.
Each new course is offset from the one below so joints never line up. For three-tab shingles, a 6-inch offset is standard, which you get by trimming 6 inches off the first shingle of the second course, 12 inches off the third, and so on. Laminated shingles have a minimum offset printed on the wrapper, and random offsets above that minimum look more natural.
Keep the tops of the shingles on your chalk lines, trim the ends flush with the rake overhang, and work up the roof.
Step 8: The ridge
Bring the top courses on each side up to the ridge, trim them so they meet at the peak without overlapping it, and nail them down. Then fit ridge cap over the peak, starting at the end away from the prevailing wind so each piece laps downwind.
Bend each cap piece over the ridge (warm it first in cold weather, or it will crack), and nail it with one nail on each side, about 1 inch in from the edge, where the next piece will cover the heads. Keep a consistent exposure, usually about 5 inches. The last piece gets its nails exposed; seal each head with a dab of roofing cement.
A single-slope shed has no ridge, and the top edge needs its own detail, which is covered in how to finish the last row of shingles on a shed roof.
Sealing in cool weather
Shingle sealant strips activate with the sun’s heat. In summer, they bond within days. Laid in cold weather, they may not seal until spring, and an unsealed shingle is a flap in the wind.
If you are shingling late in the year, follow the manufacturer’s cold-weather instructions, which usually means a few quarter-sized dabs of asphalt roofing cement under each tab. Too much cement causes blistering, so keep the dabs small.
Working safely on a shed roof
Low is not the same as safe. Most roofing falls are from single-story heights, often from the ladder rather than the roof. Set the ladder on firm, level ground, at roughly one foot out for every four up, extending at least 3 feet above the eave. Do not walk on shingles, underlayment, or a deck that is wet, frosty, or dusty, since fresh granules and synthetic underlayment are both slippery. On anything steeper than about 6 in 12, use roof brackets and a plank rather than relying on grip. If the shed roof will not take your weight between rafters, it will not take it at all.
Mistakes that cause most shed roof leaks
- Shingling a roof below 2 in 12. It will leak, even if everything else is done right.
- No starter course. The first row lifts, and water gets behind the cutouts.
- Drip edge in the wrong order at eaves or rakes, which channels water behind the metal.
- Nails too high, too few, or overdriven. This is behind most shingles lost to wind.
- Joints lining up between courses, which creates a channel straight to the deck.
- Exposure drifting wider as you go up, leaving nail lines uncovered.
- Exposed nails left unsealed on the final ridge piece or top edge.
Do you need a permit?
Often not for a shed, but check. The model residential code exempts small detached single-story accessory buildings from a building permit, with the common threshold at 200 square feet of floor area, and many local codes follow a similar line. Re-roofing an existing shed is frequently exempt too. Your local building department sets the actual rule.
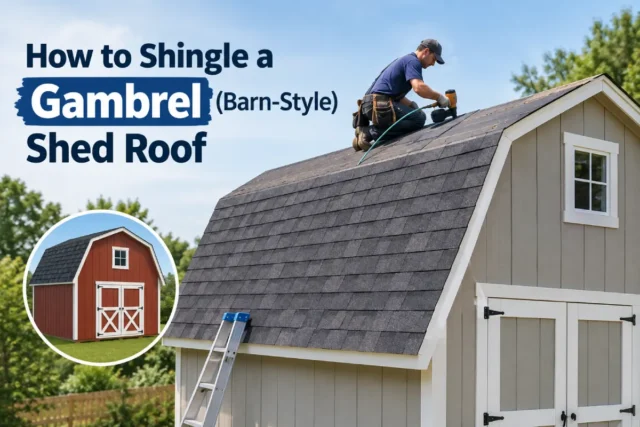
If your shed has a barn-style roof with two slopes on each side, the break between them needs its own detail, covered in how to shingle a gambrel shed roof. For a single slope that meets a wall, see how to shingle a lean-to shed roof.
Conclusion
Check that the pitch is at least 2 in 12, and put down double underlayment if it is under 4 in 12. Then follow the sequence: eave drip edge, underlayment, rake drip edge, chalk lines, starter, courses nailed on the line and offset, and a ridge or top edge finished so no nail is left bare.
Get the nailing and the drip edge order right, and a shed roof shingled on a weekend can outlast the shed. Most of what goes wrong is decided in the first hour, before a single shingle goes on.