How to Shingle a Lean-To Shed Roof (Including the Wall Joint)
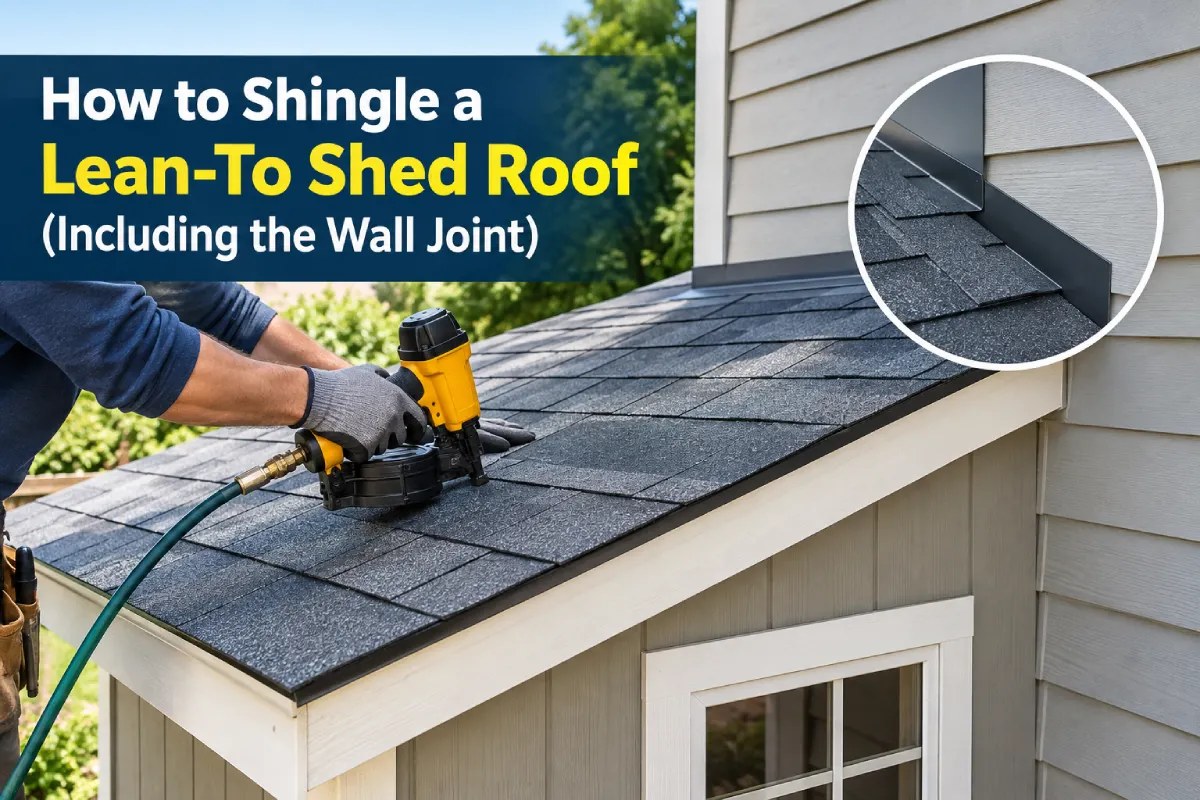
A lean-to shed has a single roof slope, high on one side and low on the other. Shingling one follows the same basic sequence as any other roof, with two differences that decide whether it keeps water out: lean-to roofs are often too shallow for shingles, and the high side needs a finish of its own because there is no ridge.
Settle both before anything goes on the roof.
The pitch problem with lean-tos
Lean-to sheds are frequently built with a gentle slope, because it keeps the high wall short and the building simple. That slope is often lower than asphalt shingles can handle.
To get the rafter length and roof area for a lean-to first, use the Shed and Lean-To Roof Calculator.
The residential code does not allow asphalt shingles below a pitch of 2 in 12, meaning 2 inches of rise for every 12 inches of run. Between 2 in 12 and 4 in 12 they are allowed only over a double layer of underlayment.
To check yours, measure how much higher the top of the roof is than the bottom, and the horizontal distance between them. A shed 8 feet deep (96 inches) with a high side 16 inches above the low side has a pitch of 16 divided by 96, times 12: exactly 2 in 12. Anything shallower than that rules shingles out. The roof pitch calculator does the conversion from any two measurements.
If the pitch is below 2 in 12, use a low-slope material instead. Roll roofing is allowed from 1 in 12, and a rubber membrane from 1/4 in 12. Shingles laid on a shallower roof will leak regardless of how carefully they are nailed.
Freestanding or attached?
The high side is finished differently depending on what is above it.
- Freestanding lean-to: the high edge is open, with a fascia or trim board below it. It gets a metal edge detail.
- Attached lean-to: the high side runs into the wall of a house, garage or fence structure. It gets headwall flashing.
Everything else, from the eave to the last course, is the same for both.
What you need
- Shingles, starter strip, and one spare bundle. Measure the roof along the slope, multiply by its width, add about 10 percent, and divide by 100 for squares; most shingles come three bundles to the square. The shingle bundle calculator works it out.
- Underlayment, doubled if the pitch is under 4 in 12.
- Drip edge for the low eave, both rakes, and a freestanding high edge.
- For an attached lean-to, L-shaped headwall flashing and, if the wall continues past the roof, a kick-out flashing.
- Galvanized roofing nails long enough to penetrate the deck, and a tube of roofing sealant.
Step 1: The low edge
The low edge takes all the water from the roof, so start there. Make sure the deck is sound and dry, then nail drip edge along the eave directly onto the deck, overhanging the fascia.
If the shed will have a gutter, which on a lean-to is worth it since every drop from the roof lands along one wall, plan it now. The drip edge should reach far enough to put water into the gutter rather than behind it.
Step 2: Underlayment
Roll the first course along the low edge, lapping over the eave drip edge, and work up toward the high side with each course overlapping the one below.
Under 4 in 12, lay it double: a narrow strip first at the eave, then full-width sheets each lapping the one below by a little over half their width. On a shallow lean-to, many builders use self-adhered ice-and-water membrane along the whole low edge instead, which is a sensible upgrade where the roof drains slowly.
At the high side:
- Freestanding: wrap the underlayment over the high edge and fasten it to the face of the board below.
- Attached: turn it several inches up the wall.
Step 3: Drip edge on the sloping sides
Fit drip edge along both rakes on top of the underlayment, starting at the low end so each higher piece laps over the one below it. Underlayment goes over the metal at the eave and under it at the rakes, so water is always carried outward.
Step 4: Starter and courses
Snap horizontal chalk lines at the exposure printed on the bundle. Lay a starter course along the eave with its sealant strip at the bottom edge, overhanging the drip edge by roughly 1/4 to 3/4 inch.
Lay the first full course flush with the starter, and work upward:
- At least four nails per shingle, on the manufacturer’s nail line, and six in high-wind areas where the maker requires it.
- Offset joints between courses, commonly by 6 inches for three-tab shingles, and by at least the printed minimum for laminated ones.
- Trim the ends flush with the rake overhang.
A lean-to often has a single long run of courses with nothing to break it up, so wavering lines show. Keep checking the tops against your chalk lines.
Step 5a: Finishing a freestanding high edge
Trim the last course flush with the high edge. If its nail line falls close to the top, add a strip cut from the upper part of a shingle, sealant strip toward the edge, and nail it within about an inch of the edge.
Then fit metal drip edge, or a wider top-edge trim, over the shingles: the flat flange lies on the last course and the lip folds down the face of the board. Fasten it through the face, not through the top of the shingles, and run a thin bead of sealant under the lower edge of the flange.
That leaves every nail under metal, which is far more durable than the common shortcut of covering exposed nail heads with roofing cement. There is more on this in how to finish the last row of shingles on a shed roof.
Step 5b: Finishing against a wall
This joint is where attached lean-tos leak, usually because it was sealed rather than flashed.
- Take the shingles up to the wall. Trim the top course so it meets the wall and nail it as high as practical.
- Fit the headwall flashing. One leg lies on top of the last course, at least 4 inches; the other runs up the wall, also at least 4 inches.
- Get the upright leg behind the cladding. On sided walls, loosen the bottom course of siding and slide the flashing up behind it and behind the house wrap. On masonry, the top of the flashing is covered by a counter-flashing set into a raked-out mortar joint.
- Fasten into the wall only. Nails through the roof leg are holes in the waterproofing.
- Add a kick-out flashing at the low end if the wall continues down past the roof edge, so water leaving the flashing is thrown clear of the wall instead of running down inside it.
The version that fails is a strip of metal caulked to the face of the siding. Water that gets behind the siding above, which it always eventually does, runs down behind the flashing and straight under the shingles.
Attached to a house? Mind the wall
Fixing a lean-to to a house wall means making holes in that wall, and the ledger board that carries the roof must be fastened into the house structure, not just the cladding. Lifting siding, setting flashing and bolting a ledger are the points where a small shed project can create a leak into the house itself. If you are not confident about what is behind the cladding, have that joint done by somebody who is. Standard ladder safety applies to the rest of the job: firm ground, roughly one foot out for every four up, and nothing done on a wet or frosty roof.
Common lean-to mistakes
- Shingles on a roof below 2 in 12.
- Single underlayment on a roof under 4 in 12.
- Caulk instead of flashing at the wall.
- Nails through the roof leg of the headwall flashing.
- Exposed nails along a freestanding high edge, covered only with cement.
- No gutter, so the whole roof drains onto one wall and one strip of ground.
Conclusion
Measure the pitch before anything else. Below 2 in 12, a lean-to needs roll roofing or a membrane, not shingles; between 2 in 12 and 4 in 12, it needs double underlayment.
From there, shingle from the low edge up as you would any roof, and finish the high side according to what is above it: metal edge trim over a freestanding top, or headwall flashing tucked behind the wall cladding where it meets a building. That joint at the top is the whole difference between a lean-to that stays dry and one that does not.