How to Compare Roofing Estimates From Different Contractors

You have done the legwork. You called multiple roofing contractors, scheduled estimate visits, and now you have three, four, or maybe five written estimates sitting on your kitchen table — or more likely, in your email inbox. They range from $9,500 to $19,000, and you are trying to figure out why the numbers are so different and which one represents the best choice for your home.
Comparing roofing estimates is one of the most important steps in the process of hiring a contractor, and it is also one of the most misunderstood. Many homeowners simply compare the bottom-line numbers and choose the lowest bid. Others assume the highest bid must be the best. Neither approach is reliable. The truth is that a meaningful comparison requires digging into the details of each estimate and understanding exactly what you are getting for the price.
This article provides a step-by-step approach to comparing roofing estimates so you can make an informed, confident decision based on value rather than just price.
Why Estimates Vary So Widely
Estimates for the same roof can differ by thousands of dollars because contractors quote different materials, include different work, and carry different overhead, crew costs, and warranties. Our guide to why roofing estimates differ so much explains each of those causes. This article is about the practical job of lining the bids up so that the comparison is fair.
Step 1: Standardize What You Are Comparing
The most common mistake in comparing roofing estimates is comparing numbers that are not measuring the same thing. Before you can compare price, you need to compare scope.
Create a spreadsheet or a simple document with a list of every component that should be included in a roof replacement. At a minimum, this list should include the following items: tear-off and disposal of the existing roofing materials, the number of layers being removed, decking inspection and repair allowance, drip edge installation, ice and water shield membrane (including where it will be applied), synthetic underlayment or felt paper, flashing replacement (chimney, valleys, walls, vents, skylights), the specific roofing material (brand, model, color, and warranty), starter strip shingles, hip and ridge cap shingles, ventilation components (ridge vent, soffit vents, or other), pipe boots and other accessories, cleanup and debris removal, permit and inspection fees, workmanship warranty terms, and the deposit and payment schedule.
For each estimate, go through this list and note whether the item is included, excluded, or not mentioned. If an estimate does not address a particular item, contact the contractor and ask. Do not assume that silence means inclusion — it often means exclusion.
This process reveals what each contractor is actually offering for their price. A low bid that excludes flashing replacement, ventilation upgrades, and decking repair is not comparable to a higher bid that includes all of those items. Once you add the excluded items back in, the low bid may not be low anymore.
Step 2: Compare Materials in Detail
Once you have established the scope of work for each estimate, examine the materials each contractor is proposing.
For the roofing material itself — the shingles, metal panels, tiles, or other primary roofing material — note the manufacturer, the specific product line, and the warranty coverage. Not all architectural shingles are created equal. A premium architectural shingle from a top manufacturer with a lifetime warranty is a different product from a budget architectural shingle from a lesser-known manufacturer with a 25-year warranty. The price difference between these products can be significant, and the performance difference can be equally significant over the life of the roof.
For underlayment, note whether the contractor is using synthetic underlayment or traditional felt paper, and if synthetic, what grade and brand. Synthetic underlayment is generally superior to felt paper in durability, tear resistance, and water resistance, but there is variation among synthetic products as well.
For ice and water shield, note the brand and where it will be applied. Building codes require an ice barrier along the eaves in areas with a history of ice dams, and many manufacturers and contractors also use it in valleys and around penetrations. Some contractors apply it more generously than code requires, which provides enhanced protection at additional cost.
For flashing, note the material (aluminum, galvanized steel, or copper) and whether all flashing is being replaced or only selected areas. Reusing old flashing is a cost-cutting measure that can lead to problems, since old flashing may not integrate properly with new roofing materials.
For ventilation components, note the type and brand of ridge vent, soffit vents, or other ventilation products being proposed. Quality ventilation products perform better and last longer than budget options.
Step 3: Evaluate the Labor and Installation Approach
The quality of the installation is at least as important as the quality of the materials — and it is harder to evaluate from a written estimate. However, there are clues you can look for.
Does the estimate describe the installation method? A detailed estimate might specify the nailing pattern for the shingles (which affects wind resistance), the method for valley installation (closed-cut, woven, or open metal), and the approach to flashing at complex transitions. More detail indicates more thought and planning.
Does the contractor describe their crew? Some estimates mention that the work will be performed by the company’s own trained crews rather than subcontractors. While subcontractor use is not inherently bad, knowing who will be on your roof helps you evaluate the experience and accountability behind the work.
Does the estimate reference manufacturer installation specifications? Quality contractors install materials according to the manufacturer’s written instructions, which is also a requirement of most manufacturer warranties. An estimate that references adherence to manufacturer specifications indicates a contractor who takes quality seriously.
What is the contractor’s reputation for installation quality? The estimate itself will not tell you this, but your research will. Online reviews, references, and your observations of the contractor’s current projects all contribute to your assessment of their installation quality.
Step 4: Compare Warranty Terms Side by Side
Warranty coverage is a significant component of the value you receive from a roof replacement, and it varies considerably between contractors.
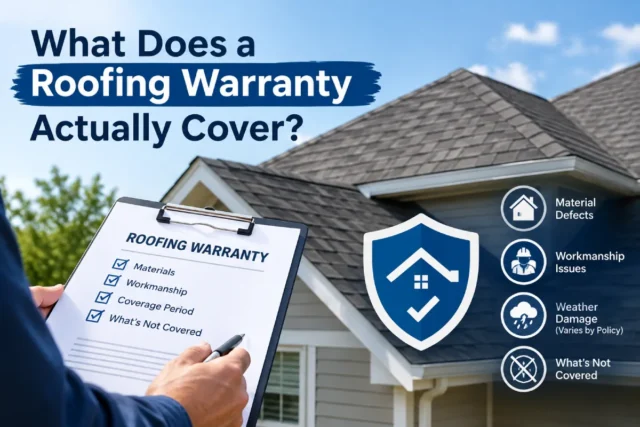
Create a comparison of the warranty terms offered by each contractor. For each estimate, note the manufacturer warranty on the roofing material (duration, whether it is prorated, what is covered), the contractor’s workmanship warranty (duration, what is covered, how claims are handled), and whether an enhanced manufacturer warranty is available or included (which often covers both materials and labor).
A contractor offering a 25-year material warranty and a one-year workmanship warranty is offering a fundamentally different level of protection than a contractor offering a 50-year non-prorated material warranty and a ten-year workmanship warranty. The difference in warranty coverage can easily justify a difference in price.
Remember that a warranty is only as reliable as the company backing it. A strong warranty from a well-established, financially stable contractor is worth more than a generous warranty from a contractor who may not be in business next year.
Step 5: Consider the Contractor’s Qualifications
Beyond the estimate itself, the qualifications of each contractor should factor into your comparison.
Is each contractor licensed and insured? This should be verified independently, not just taken at face value based on the estimate.
How long has each contractor been in business, and how long have they been operating in your area? A contractor with a decade or more of local experience has a demonstrated track record that you can evaluate.
What is each contractor’s reputation based on online reviews, Better Business Bureau records, and references? A pattern of positive reviews from satisfied customers is a strong indicator of reliable performance.
Is each contractor certified by the manufacturer of the roofing material being proposed? Manufacturer certification programs require contractors to meet training, installation, and customer satisfaction standards. Certified contractors can often offer enhanced warranty programs that non-certified contractors cannot.
How does each contractor communicate and conduct themselves? Your interactions during the estimate process are a preview of what the project experience will be like. Professionalism, responsiveness, and transparency during the estimate phase indicate a contractor who will maintain those standards throughout the project.
Step 6: Evaluate Value, Not Just Price
Now that you have a detailed understanding of what each estimate includes — the materials, the scope of work, the warranty terms, and the contractor’s qualifications — you can evaluate the value of each bid, not just the price.
Value is the combination of what you get and what you pay for it. A lower price for inferior materials, a limited scope of work, a weak warranty, and a contractor with a questionable track record is not a good value — it is a risk. A higher price for premium materials, a comprehensive scope, a strong warranty, and a contractor with an excellent reputation may be an excellent value — even though it costs more upfront.
To evaluate value, ask yourself: Which estimate gives me the best combination of materials, workmanship, warranty, and contractor reliability for the price? Which contractor do I trust most to do the job right and stand behind their work? Which estimate accounts for the most complete scope of work with the fewest surprises likely during the project?
These are judgment calls, and reasonable people can weigh the factors differently. But by going through the detailed comparison process, you are making those judgment calls based on solid information rather than guesswork or the allure of a low number.
Step 7: Ask Clarifying Questions
If the comparison process reveals differences that you do not understand, ask the contractors to explain. Call each contractor and say: “I have received several estimates and I am trying to compare them fairly. Your estimate is higher/lower than the others. Can you help me understand what is driving the difference?”
A good contractor will welcome this conversation. They will walk you through their estimate, explain their material choices, describe their installation approach, and articulate why their price is what it is. This conversation is itself a data point — it reveals the contractor’s knowledge, communication style, and willingness to engage with an informed customer.
If a contractor becomes defensive, dismissive, or evasive when you ask them to explain their estimate, that tells you something important about how they will handle questions and concerns during the project.
Step 8: Make Your Decision
After completing the comparison, you should have a clear picture of what each contractor is offering and how the estimates differ. Now it is time to choose.
Select the contractor who offers the best overall value — the best combination of materials, scope, warranty, reputation, communication, and price. This may or may not be the lowest bid. In many cases, the best value is a mid-range bid from a highly qualified contractor who includes everything, uses quality materials, and stands behind their work with a strong warranty.
Once you have made your decision, contact the contractor to confirm the scope of work and the price. Review the contract carefully before signing. Make sure everything you discussed and agreed upon is reflected in the written contract.
Then let the other contractors know that you have chosen a different company. A simple phone call or email is a professional courtesy that contractors appreciate, even though they did not get the job.
Common Mistakes to Avoid
As you work through the comparison process, be aware of these common pitfalls.
Do not choose based solely on price. The lowest bid is often the lowest for a reason — excluded items, inferior materials, or a plan to make up the difference with change orders.
Do not assume that the highest bid is the best. Some contractors charge premium prices without delivering premium quality. Evaluate each bid on its merits.
Walk away when you see this
Do not ignore red flags. If an estimate is vague, if the contractor is difficult to reach, if they pressure you to sign quickly, or if they cannot provide proof of licensing and insurance, those are red flags regardless of the price.
Do not compare estimates that cover different scopes of work. If one estimate includes full tear-off, new flashing, and ventilation upgrades while another does not, the numbers are not comparable. Standardize the scope first, then compare.
Do not rush the decision. Take the time you need to compare carefully and make a confident choice. A contractor who pressures you to decide immediately is more interested in closing the deal than in earning your trust.
The Bottom Line
Comparing roofing estimates is not just about finding the lowest number — it is about finding the best value. By standardizing the scope of work, examining materials in detail, evaluating warranty terms, considering contractor qualifications, and assessing the overall value of each bid, you can make an informed decision that protects your home and your budget.
The time you invest in a thorough comparison will pay off in a roof that is properly installed, adequately warranted, and backed by a contractor who will be there if you need them. That is worth far more than the few dollars you might save by choosing the cheapest bid.